Hello to you all! I hope you are all doing well and having a wonderful weekend! Ours has been a rough one. We've had this stomach bug that has passed it's way all through our house. Unfortunately for me, I got it also. It's really hard to take care of yourself and your kids all while your hubby is away. Luckily he made it home last night so I am no longer on doing the whole thing on my own. ...and fortunately I am starting to join the land of the living again!
That said...how great is your imagination? I didn't have a chance...wasn't feeling up to movement actually!...to make it to Michaels for another sheet of matboard to finish off my tutorial. Well, I could just leave the dimensions. I'm guessing you could probably get it with just that but for some reason it's confusing to me so how about we pretend! By that I mean for the first part of the tutorial pretend that my printer paper is actually matboard and the lines are drawn to scale...and straight...and the pictures are taken on a clean desk.... ;)
Here we go....hopefully I will make it to Michaels to replace this with the real deal but for now....
1.) The measurements for the 'long' side of the box...this is the side with the top are 25". You will measure 6" across and then create a double line of 25".

2.) From either end, measure and draw a line at the 1" mark.

3.) From the end of this mark (#2) draw a line at the 6 " mark. Repeat this two more times...this will leave you with 1 - 1" box and 4 - 6" boxes. The box with the 1" box will then become the 'top' of your box.

4.) Working with the top of the box, measure a 1" box on either side of the 6" box just below the 1" box.

5.) Skip the next 6" box and go to the next...this will be the third 6" box from the 1" box....measure out 6" from both sides of this box on both sides. This will create the sides of the box.

6.) Cut along the outer lines only...all inner lines are used for score marks. Once you have cut the outside you can score the inner lines. I used a hobby blade for this. Mine is pretty dull so yours may give you what you want from the first cut. It took two for mine.

***and suddenly...it's to scale...and on matboard....hmmmm.... :)
7.) Once you've cut and scored all lines you need to tape the sides together with red sticky tape. Now your box is ready to decorate!

****Tippy cup of milk is optional ... :)
***If you are going to make holes in the top like I did...remember to make them before you tape the sides of the top as it's easier with a crop-a-dile. I used my silent setter once the whole box was embellished...it just took a bit longer.
Here's my final project which I was really surprised and quite flattered to see over at Card of the Week. Thanks for the shout out! That's so sweet! ;)

Please let me know if you have any questions and if you decide to give this a try I would love to see your finished project! Link it or drop me a line so I can check yours out!
***A couple of quick notes...I'm so sorry for all of my stamping friends across the 'pond'...I forget sometimes that you all aren't just right next door! I used matboard for this. That's the same stuff here that they use to 'mat' a picture with. Probably any hobby store or framing store would have that there. Lots of times you can find sheets that are marked down since maybe they were leftovers or cut wrong. I try and stock up when I find this. It's kind of the same as chipboard except that I haven't found a place that will sell me 'sheets' of chipboard. The total length of the matboard I purchased is 25X18. hth :)
I think I have decided to shrink this project. I think it would also be lots of fun to make little goody boxes for thankyous I might need...you can never have to many thank you ...uh...stuff...you know, cards, bags, boxes...whatever.
I hope you are all having a great evening! I am going to see if I can get back in the swing of things. I still just think I want to crawl in bed!...which is so hard because I just got some new toys I really want to play with!
Have a fabulous night! I will post you soon! :)


 Well, I'm off to catch up a bit around here. I will post you all soon!

 Pretty sneaky huh...I can't wait to show you the rest tomorrow...be sure and stop by the rest of the design team to see what they have to share....


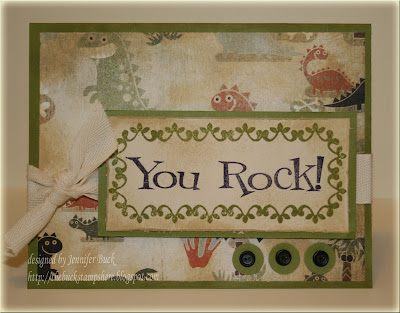
 This is truly an EPLS...created in all of about 10 minutes! You gotta love that! I used my Basic Grey paper...and the stamp is called


 2.) From either end, measure and draw a line at the 1" mark.
 3.) From the end of this mark (#2) draw a line at the 6 " mark. Repeat this two more times...this will leave you with 1 - 1" box and 4 - 6" boxes. The box with the 1" box will then become the 'top' of your box.
 4.) Working with the top of the box, measure a 1" box on either side of the 6" box just below the 1" box.
 5.) Skip the next 6" box and go to the next...this will be the third 6" box from the 1" box....measure out 6" from both sides of this box on both sides. This will create the sides of the box.
 6.) Cut along the outer lines only...all inner lines are used for score marks. Once you have cut the outside you can score the inner lines. I used a hobby blade for this. Mine is pretty dull so yours may give you what you want from the first cut. It took two for mine.
 ***and suddenly...it's to scale...and on matboard....hmmmm.... :)
 ****Tippy cup of milk is optional ... :)

 ...hey...if you feel like royalty...you should 'Act like royalty'....***she said...right before she went to change the stinky diaper! Oh yeah, I'm royalty allright! :)
 Of course, I have to show a shot of the envelopes.....
 I colored my leaves with my copic markers. I used YR23, YR04, & YG95. After I stamped my images in SU classic Basic Black, I outlined the outer part of the leaves with YG95 then I outlined the inner stems with YR04. Here's a picture of what it looked like...


